Sore ini saya sudah memenuhi tugas untuk membuat web desain !!
Dan dibawah inilah gambar dan scripnya :)
<!DOCTYPE html>
<html>
<head>
<title>Web Warung Tegal</title>
<style type="text/css">
header, section, footer, aside, nav, article, figure, figcaption {
display: block;}
body {
color: #666666;
background-color: #f9f8f6;
background-image: url("images/is.jpg");
background-position: center;
font-family: Georgia, Times, serif;
line-height: 1.4em;
margin: 0px;}
.wrapper {
width: 940px;
margin: 20px auto 20px auto;
border: 2px solid #000000;
background-color: #ffffff;}
header {
height: 160px;
background-image: url(images/judul.png);}
h1 {
text-indent: -9999px;
width: 940px;
height: 130px;
margin: 0px;}
nav, footer {
clear: both;
color: #ffffff;
background-color: #aeaca8;
height: 30px;}
nav ul {
margin: 0px;
padding: 5px 0px 5px 30px;}
nav li {
display: inline;
margin-right: 40px;}
nav li a {
color: #ffffff;}
nav li a:hover, nav li a.current {
color: #000000;}
section.courses {
float: left;
width: 659px;
border-right: 1px solid #eeeeee;}
article {
clear: both;
overflow: auto;
width: 100%;}
hgroup {
margin-top: 40px;}
figure {
float: left;
width: 290px;
height: 220px;
padding: 5px;
margin: 20px;
border: 1px solid #eeeeee;}
figcaption {
font-size: 90%;
text-align: left;}
aside {
width: 230px;
float: left;
padding: 0px 0px 0px 20px;}
aside section a {
display: block;
padding: 10px;
border-bottom: 1px solid #eeeeee;}
aside section a:hover {
color: #985d6a;
background-color: #efefef;}
a {
color: #de6581;
text-decoration: none;}
h1, h2, h3 {
font-weight: normal;}
h2 {
margin: 10px 0px 5px 0px;
padding: 0px;}
h3 {
margin: 0px 0px 10px 0px;
color: #de6581;}
aside h2 {
padding: 30px 0px 10px 0px;
color: #de6581;}
footer {
font-size: 80%;
padding: 7px 0px 0px 20px;}
</style>
<!--[if lt IE 9]>
<script src="http://html5shiv.googlecode.com/svn/trunk/html5.js"></script>
<![endif]-->
</head>
<body>
<div class="wrapper">
<header>
<h1>Makanan Khas Indonesia</h1>
<nav>
<ul>
<li><a href="" class="current">beranda</a></li>
<li><a href="daftarmakanan.html">daftar masakan</a></li>
<li><a href="katering.html">katering</a></li>
<li><a href="tentang.html">tentang</a></li>
<li><a href="kontak.html">kontak</a></li>
</ul>
</nav>
</header>
<section class="courses">
<article>
<figure>
<img src="images/bakso.jpg" alt="bakso" style="width:290px;height:215px;" />
<figcaption>Bakso Nusantara</figcaption>
</figure>
<hgroup>
<h2><u>Bakso Pak Di</u></h2>
<h3>Makanan Berkuah</h3>
</hgroup>
<p><b>Bakso</b> adalah makanan khas Indonesia yang berupa sejenis makanan bervariasi dengan kuah yang berwarna kekuningan.</p>
</article>
<article>
<figure>
<img src="images/nasi-goreng.jpg" alt="nasi-goreng" style="width:290px;height:215px;" />
<figcaption>Pecel Indonesia</figcaption>
</figure>
<hgroup>
<h2>Masakan Pecel</h2>
<h3>Makanan dengan Bumbu Kacang</h3>
</hgroup>
<p><b>Pecel</b> adalah makanan yang menggunakan bumbu sambal kacang sebagai bahan utamanya yang dicampur dengan aneka jenis sayuran.</p>
</article>
</section>
<aside>
<section class="popular-recipes">
<h2>Masakan Populer</h2>
<a href="sayursop.html">Sayur Sop</a>
<a href="">Sayur Asem</a>
<a href="">Sayur Lodeh</a>
<a href="">Sayur Bayam</a>
</section>
<section class="contact-details">
<h2>Kontak</h2>
<p>Warung Tegal<br />
di seluruh indonesia
</section>
</aside>
<footer>
© 2015 Warung Tegal Memang Top
</footer>
</div><!-- .wrapper -->
</body>
</html>
<!DOCTYPE html>
<html>
<head>
<style>
ul#menu {
padding: 0;
}
ul#menu li {
display: inline;
}
ul#menu li a {
background-color: black;
color: white;
padding: 10px 20px;
text-decoration: none;
border-radius: 4px 4px 0 0;
}
ul#menu li a:hover {
background-color: orange;
}
</style>
</head>
<body>
<h2>Daftar Makanan Khas <i>Indonesia</i></h2><hr><br>
<ul id="menu">
<h1>Soto Lamongan</h1>
<p><h3>Soto adalah salah satu makanan khas Indonesia yang disajikan dengan kuah dan diisi dengan daging, sayuran dan berbagai macam bumbu.
Uniknya, soto di Indonesia memiliki beragam jenis sesuai dengan daerahnya. Contohnya saja ada soto Kudus khas kota Kudus, soto Bandung,
soto Betawi, soto Madura dan lainnya. Salah satu menu andalan adalah soto Betawi khas Jakarta.
Soto Betawi sendiri tak seperti soto lainnya. Ia memiliki kuah kental berwarna putih kekuningan karena di dalamnya diwarnai dengan santan.
Soal daging yang dipakai, soto betawi bisa disajikan dengan menggunakan daging sapi, kambing ataupun ayam.
Soto Betawi ini pun akan diracik dengan daun bawang dan bawang goreng serta disajikan dengan kerupuk emping yang tak boleh dilewatkan.Hmm dijamin puass dehh</h3></p>
<img src="images/soto.jpg" alt="soto" style="width:290px;height:228px;" /><br><br>
<li><a href="/html/default.asp">Soto Lamongan</a></li><hr><br>
<img src="images/gado-gado.jpg" alt="gado-gado" style="width:290px;height:228px;" /><br><br>
<li><a href="/css/default.asp">Gado-gado</a></li><hr><br>
<img src="images/gudeg.jpg" alt="gudeg" style="width:290px;height:228px;" /><br><br>
<li><a href="/js/default.asp">gudeg</a></li><hr><br>
<img src="images/gorengan.jpg" alt="gorengan" style="width:290px;height:228px;" /><br><br>
<li><a href="/php/default.asp">Gorengan</a></li><hr><br>
<img src="images/nasi-goreng.jpg" alt="nasi-goreng" style="width:290px;height:228px;" /><br><br>
<li><a href="/php/default.asp">Nasi goreng</a></li><hr><br>
<img src="images/opor-ayam.jpg" alt="opor-ayam" style="width:290px;height:228px;" /><br><br>
<li><a href="/php/default.asp">Opor Ayam</a></li><hr><br>
<img src="images/pecel.jpg" alt="pecel" style="width:290px;height:228px;" /><br><br>
<li><a href="/php/default.asp">Pecel</a></li><hr><br>
<img src="images/pempek.jpg" alt="pempek" style="width:290px;height:228px;" /><br><br>
<li><a href="/php/default.asp">Pempek</a></li><hr><br>
<img src="images/rendang-padang.jpg" alt="rendang-padang" style="width:290px;height:228px;" /><br><br>
<li><a href="/php/default.asp">Rendang Padang</a></li><hr><br>
<img src="images/bakso.jpg" alt="bakso" style="width:290px;height:228px;" /><br><br>
<li><a href="/php/default.asp">Bakso</a></li><hr><br>
</ul>
</body>
</html>
<!DOCTYPE html>
<html>
<head>
<style>
table, th, td {
border: 1px solid black;
border-collapse: collapse;
background-image: url("images/dark-wood.jpg");
color:red;
}
th, td {
padding: 5px;
text-align: left;
}
table#t01 {
width: 100%;
background-color: #f1f1c1;
}
</style>
</head>
<body>
<table style="width:100%">
<tr>
<th>Nama Makanan</th>
<th>Gambar Makanan</th>
<th>Harga Makanan</th>
</tr>
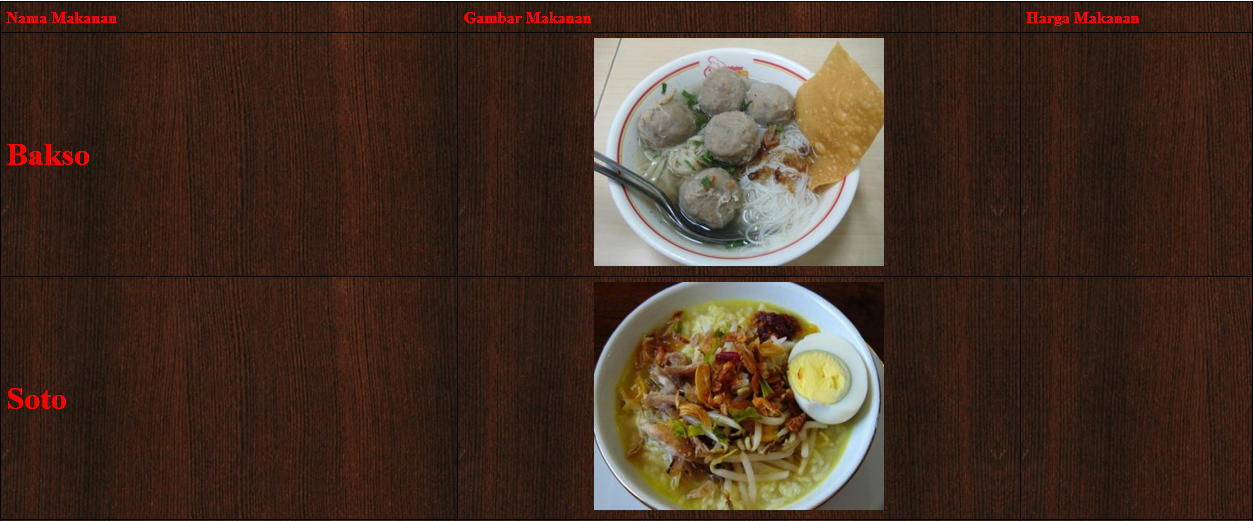
<tr>
<td><h1>Bakso</h1></td>
<td><center><img src="images/bakso.jpg" alt="bakso" style="width:290px;height:228px;" /></center></td>
<td><h1></h1></td>
</tr>
<tr>
<td><h1>Soto</h1></td>
<td><center><img src="images/soto.jpg" alt="soto" style="width:290px;height:228px;" /></center></td>
<td><h1></h1></td>
</tr>
<tr>
<td><h1>Nasi Goreng</h1></td>
<td><center><img src="images/nasi-goreng.jpg" alt="nasi-goreng" style="width:290px;height:228px;" /></center></td>
<td><h1></h1></td>
</tr>
<tr>
<td><h1>Pempek</h1></td>
<td><center><img src="images/pempek.jpg" alt="pempek" style="width:290px;height:228px;" /></center></td>
<<td><h1></h1></td>
</tr>
<tr>
<td><h1>Gado gado</h1></td>
<td><center><img src="images/gado-gado.jpg" alt="gado-gado" style="width:290px;height:228px;" /></center></td>
<td><h1></h1></td>
</tr>
<tr>
<td><h1>Gudeg</h1></td>
<td><center><img src="images/gudeg.jpg" alt="gudeg" style="width:290px;height:228px;" /></center></td>
<<td><h1></h1></td>
</tr>
<tr>
<td><h1>Opor Ayam</h1></td>
<td><center><img src="images/opor-ayam.jpg" alt="opor-ayam" style="width:290px;height:228px;" /></center></td>
<td><h1></h1></td>
</tr>
<tr>
<td><h1>Gorengan</h1></td>
<td><center><img src="images/gorengan.jpg" alt="gorengan" style="width:290px;height:228px;" /></center></td>
<td><h1></h1></td>
</tr>
<tr>
<td><h1>Pecel</h1></td>
<td><center><img src="images/pecel.jpg" alt="pecel" style="width:290px;height:228px;" /></center></td>
<td><h1></h1></td>
</tr>
<tr>
<td><h1>Rendang Padang</h1></td>
<td><center><img src="images/rendang-padang.jpg" alt="rendang-padang" style="width:290px;height:228px;" /></center></td>
<td><h1></h1></td>
</tr>
</table>
</body>
</html>
<!DOCTYPE html>
<html>
<head>
<style>
#header {
background-color:black;
color:white;
text-align:center;
padding:5px;
}
#nav {
line-height:30px;
background-color:#eeeeee;
height:300px;
width:100px;
float:left;
padding:5px;
}
#section {
width:350px;
float:left;
padding:10px;
}
#footer {
background-color:black;
color:white;
clear:both;
text-align:center;
padding:5px;
}
</style>
</head>
<body>
<div id="header">
<h1>Makanan Khas indonesia</h1>
</div>
<div id="nav">
Soto<br>
Nasi Goreng<br>
Pempek<br>
</div>
<div id="section">
<h2><b>Makanan Khas Indonesia<b></h2>
<p></p>
<p></p>
</div>
<div id="footer">
© 2015 Warung Tegal Memang Top
</div>
</body>
</html>
<html>
<head>
<title></title>
</head>
<body>
<h1>Sayur Sop</h1>
<p>Sayur sop adalah salah satu jenis hidangan yang begitu kaya akan jenis sayuran. Kaya warna, kaya rasa, dan pastinya juga kaya akan gizi.
Sangat pas disajikan sebagai salah satu hidangan saat berbuka puasa. Membuatnya pun tidaklah terlalu sulit.
Dengan bumbu dan bahan sederhana yang bisa ditemukan di pasar tradisional maupun supermarket terdekat, membuat anda tak punya alasan lagi untuk tidak mencoba membuat resep sayur sop bagi keluarga anda.</p>
<p>Selain kaya akan berbagai jenis sayuran, sayur sop semakin sehat lagi untuk dikonsumsi karena tidak menggunakan santan dalam resepnya. Dengan kuah bening, sayur sop akan sangat segar disantap setelah seharian berpuasa.
Jika tidak ingin menyantapnya dengan nasi putih, anda bisa menambahkan kentang dan makaroni ke dalam resep sehingga kebutuhan akan karbohidrat akan terpenuhi.</p>
<p>Dengan penambahan jumlah kentang dan makaroni, maka sop buatan anda bisa jadi hidangan sepinggan yang praktis.
Namun jika hendak menyantapnya dengan nasi, kentang dan makaroni tidak perlu ditambahkan jumlahnya.
Jika kurang menyukai daging ayam broiler, anda bisa menggunakan daging ayam kampung atau juga tetelan daging sapi sebagai bahan pembuat kaldu.</p>
</body>
</html>
<html>
<head>
</head>
<body bgcolor="yellow">
<h1> <u> Kontak <u> </h1>
</body>
</html>
Sekian dari pengalaman saya sore ini walaupun yang terakhir ini belum selesai, yang penting udh berusaha :D wkwkwkwk